Showing posts with label Tasty Tuesday. Show all posts

Tuesday, July 5, 2011

Enjoying summer… celebrating Independence Day

(Thought I would share pictures of some our patriotic décor and food from the weekend.)

DSC_0974

I hope you enjoyed celebrating Independence Day weekend  We did. :)

DSC_0979

We had a gathering with friends and saw a firework display on Friday night.

Then I picked blueberries with my adorable nieces on Saturday.  And took them coupon shopping with me (gotta train them young!) – they pushed their own mini carts, filled them with food, and even gave the cashier their own coupons! :)

DSC_1075

The nieces helped me make yummy desserts for Sunday using our freshly picked blueberries.

Red, white, and blue triffle – recipe found here.

DSC_1080

and a Patriotic version of fruit pizza – recipe here. DSC_1078

Sunday brought a picnic after church and another firework display in the evening.

DSC_1005

My husband was actually off on 4th of July, which gave us a 2-day weekend – yay!  ( He works every Saturday so no long weekends for us usually.)

We had friends over for games in the afternoon. 

(My patriotic summer mantel.)

DSC_1094

And planned to join in some of the local festivities in the evening.

DSC_1006

But it rained on and off throughout the afternoon and evening, so my husband and I just opted to have a quiet movie/game night at home.

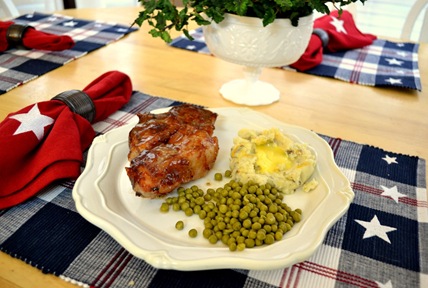
I made country style BBQ ribs in the oven, with smashed potatoes and peas.

DSC_1099

And then I was inspired by this picture and recipe on Pinterest.  Doesn’t that look delicious??!!

And decided to make my own mini version for dessert! :)

(I just made my favorite chocolate chip cookie recipe, baked it in mini springform pans, and topped with vanilla ice cream and chocolate syrup.)

DSC_1100    

I think we had more fun just staying home together, than trying to fight the crowds to watch noisy fireworks (we had already seen two fireworks displays on Friday and Sunday night anyways.)

We’ll have to remember to do that more of that this summer instead spending money running around to different events. 

DSC_1063

How did you spend your 4th of July weekend?

Happy Summer!

Thursday, June 16, 2011

Guest post: When life gives you over-ripened fruit, make a smoothie!

I am excited to introduce you to my friend, Christa.  She recently started blogging at Brown Sugar Toast and I love her blog and writing style!  Take it away, Christa!

-------------------------

Hey! I'm Christa from Brown Sugar Toast. Nice to meet ya. :) I'm so happy I can be with you here at Centsible Savings! Christina does an awesome job saving money and sharing how she does it. I especially love all her Décor on a Dime posts!

My goal at Brown Sugar Toast is to help my readers add sweetness to the mundane things in life - specifically cooking crafting, and homemaking.

Today, I want to share a little post with you about one of my all-time fave things. It starts out lookin' a little rough, so ... just bear with me. ;)

What do you do when you have bananas that look like this:


Strawberries that are getting a little on the older side:


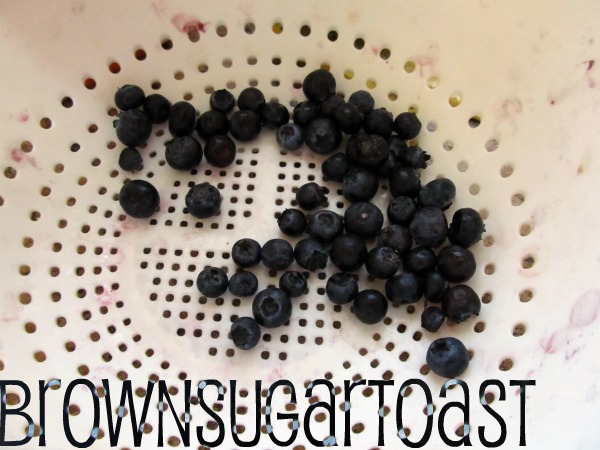
A handful of lonely blueberries:


And some juice that's about to go bad?


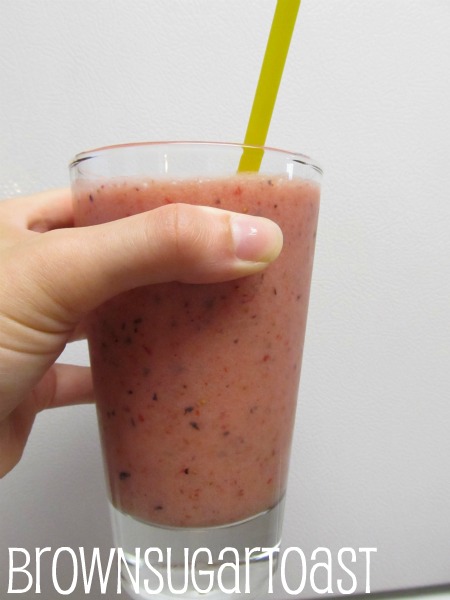
Why, these are the PERfect ingredients for a smoothie! :)

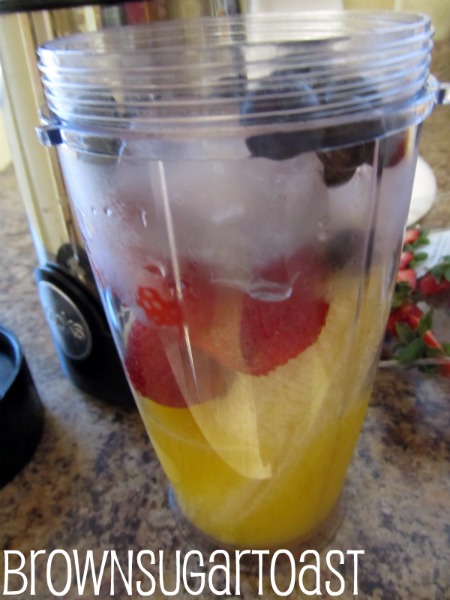
Yep - throw those things together!


I like my smoothies to be cold and icy, so if I'm using fresh fruit, I always add some ice to the mix:


Blend that thing together and, honey, you've got a healthy and delicious drink awaiting your taste buds!


The great thing about smoothies is that they are completely customizable! I usually add yogurt in mine to give it some creaminess. But I will also put a handful of fresh spinach in there too.

Did I lose you on that? ;)

Seriously. Especially when you have other strong tastes in the smoothie (like orange juice or strawberries) you will not even notice the spinach taste. Unless, of course, you put a whole bag of spinach leaves in your smoothie. :)

If you have kiddos, this is a great way to help them get more of their fruits and veggies in for the day. My little girl LOVES smoothies and yep, I put spinach in hers and am totally not ashamed of doing it. ha!
Hope that inspires you to find a great way to use up your leftover fruits and veggies!


Thanks, Christina, for letting me share over here on your awesome blog!! :)

Tuesday, June 14, 2011

Guest post: Prepare a week’s worth of dinners in ONE hour (I promise, it can be done!)

One of the things I love about blogging is the friends I have made and the enjoyment of reading about what is going on in their life.  I have been inspired by Renee's recent dinnertime prep method and can't wait to try it myself in a few weeks when life slows down for me.  Be ready to be inspired with how to make a week's worth of dinners in ONE hour! 

----------------------

Thanks, Christina, for the chance to come share my obsession passion for what has made such a huge difference in my cooking and in my family’s dinnertime!

I’m Renee, and I like to blog about a little bit of everything…

IMG_2016 2
…from my organizing and decorating fun,  the escapades of my three wild ones and the ups and downs of homeschooling, to my weekly Menu Monday post where I share that week’s adventure in planning my menu and prepping all my dinners in less than an hour!

Want the low down on this meal prep planning?

Basically I give up about an hour Sunday afternoon whilest my boys are snoozing and my girl is otherwise occupied, and in return I have all my dinners for the week... in the fridge and ready to go!

Is this plan something YOU could do too?

Absolutely... 100%!

If you read my blog long enough you'll see that I'm not anywhere close to being an amazing chef. If I can make it work... ANYONE can!

I learned all about Making Five Dinners in One Hour from Michelle back in January.  Most of these ideas are straight from her!  She does offer a paid subscription to her recipes that have the meal plan and coordinating grocery list all laid out super simply.  She also posts free recipes and tips on her blog that are definitely worth following.  What's neat about her meals/plan is that all meals are covered and kept "fresh" in the FRIDGE not the freezer!  At dinnertime you just pop one out and in the oven and you are good to go.

I have never been much of a cook actually, but through this experiment I have found myself enjoying cooking more and more. Maybe because I am taking all the stress out of the process.  I'm choosing to cook at a time more convenient for me and my family.  If your kids are anything like mine, then you know that the "witching hour" is those late afternoon hours right before dinnertime where everyone is bored and hungry and GROUCHY!

Add an infant into the mix and fixing nutritious interesting meals gets put WAY down low on the survival priority list.

I have 3 kids... an eight year old that I am homeschooling, a 3 year old that makes me constantly wonder what he's into now,  and a wee babe who loves his momma.  Needless to say, my time is very short each day, and at mealtime there may be a host of things that arise to get in the way of traditional, normal meal prep.

I think this is something everyone should at least TRY!  It has transformed our dinnertime.   I am not stressing {as much}. We are not eating blessed CHICKEN every other night anymore, and we have cut down our eating out drastically.  {And saved us much moolah!} Changing the quality of our meals also somehow motivated us to change the quality of our dinnertime experience. We went from eating in the Living Room most nights {I know.  How bad is that?} to eating around the table… as a family.  What a concept.
It is definitely a no brainer to me.  Giving up an hour on Sunday afternoon gives me my dinners for the week in the fridge and ready to go. Uh,  So. Totally. Worth. It.

Here’s how you do it.

Most any recipe can be almost completely prepped ahead of time in order to save tons of time each night. Work in stages.  I do each stage on a different day so it's not an overwhelming task.

~ First, plan your menu for the week, and create your grocery list.  {I do mine Friday, and I got my free menu plan printable here. Love it cuz it has the menu plan on one side and the grocery list on the other.}

~ Do your grocery shopping, and you will be ready to get started the next day {or whenever you choose to prep.} {We shop Saturday... usually as a fam.}

~ Make a list of every ingredient and utensil you will need.  I do this on my menu plan sheet on Fridays before I create my grocery list.

IMG_2086
~ Set the timer!  Competing against the timer helps me work quickly and turns the whole process into something of a game. {Whatever I can do to trick myself into thinking it's fun helps. Yes, I know that's sad.} I also like to turn on some tunes for some extra motivation.  :)

~ Gather all of your ingredients and utensils on the counter before you start.  Foil and Ziploc bags are your allies here.  I love Michelle's tips on using Ziploc bags to mix ingredients thereby saving the dirtying of one more bowl and spoon!  If it works, why not I say!

~ 

~Follow the recipes usually up until the point that the food is put in the oven.  At that point, cover your dishes and pop 'em in the fridge. I like to label each meal so I don't have to uncover and try to remember what each one is through the week.

IMG_2343
Easy peasy!

I am totally SOLD on this method. 

It has brought a wonderful change to our family dynamic.

Better meals each week, all week... a priceless thing!

If you think you might want to try the oh-so-marvelous prep ahead lifestyle, check out all my 5 dinner 1 hour escapades… 

Thanks, Christina, for letting me share while you’re off having a blast with Mickey!

Tuesday, May 24, 2011

Tasty Tuesday: Chocolate Velvet Pound Cake

Mmmm…eating a piece for breakfast as I type this post! :)
DSC_0124


(Don’t tell me you have never eaten chocolate cake for breakfast – it has eggs, milk, butter – all the necessary ingredients for breakfast with a little chocolate mixed in! :)

I have a small cake business, but most of the time I don’t get to eat any of the cakes that I have made! :)  So sometimes, I get the craving to make a cake, and eat it too! :) 

I was in a chocolate-craving-mood yesterday and my eyes fell upon this cookbook I have displayed on my kitchen counter. 

DSC_0128

The cake on the front looks delicious, but I was not wanting to fuss with 3 layers and icing a cake since I do that all… the... time.

I looked through the book and found this beauty – Chocolate Velvet Pound cake.

Chocolate Velvet "Pound" Cake Recipe

Bake it, dump it out of the pan and dust with sugar or drizzle with ganache – EASY and so good!  That is what I was wanting!

Here’s the link to the recipe but I will share it here too:

Chocolate Velvet Pound cake
  • 1 1/2 cups semisweet chocolate morsels
  • 1/2 cup butter, softened
  • 1 (16-ounce) package light brown sugar
  • 3 large eggs
  • 2 cups all-purpose flour
  • 1 teaspoon baking soda
  • 1/2 teaspoon salt
  • 1 (8-ounce) container sour cream
  • 1 cup hot water I used milk
  • 2 teaspoons vanilla extract
Melt semisweet chocolate morsels in a microwave-safe bowl at HIGH for 30-second intervals until melted (about 1 1/2 minutes total time). Stir until smooth.

Beat butter and brown sugar at medium speed with an electric mixer, beating about 5 minutes or until well blended. Add eggs, 1 at a time, beating just until blended after each addition. Add melted chocolate, beating just until blended.

Sift together flour, baking soda, and salt. Gradually add to chocolate mixture alternately with sour cream, beginning and ending with flour mixture. Beat at low speed just until blended after each addition. Gradually add 1 cup hot water milk in a slow, steady stream, beating at low speed just until blended. Stir in vanilla.
Spoon batter evenly into a greased and floured 10-inch tube pan bundt pan! :) Bake at 350° for 55 to 65 minutes or until a wooden pick inserted in center comes out clean. Cool in pan on a wire rack 10 minutes. Remove from pan, and let cool completely on wire rack.

I baked my cake in a bundt pan.  For one reason, because that is the pan that I have, and another reason, I LOVE the look of a bundt cake and the fact that the pan does all the decorating for me! :)

Then I whipped up this easy chocolate ganache recipe.  (Only 3 ingredients – butter, chocolate, and cream.)

DSC_0112

I topped it with fresh strawberries and a scoop of vanilla ice cream and savored devoured every bite!

DSC_0117

It is moist, tender, rich, and delicious!!! The perfect chocolate pound cake for the summer to top with fresh fruit or ice cream! 

Linking up to:

Wednesday, March 30, 2011

Tasty Tuesday: Almost free, super yummy Creamy Bacon + Veggie Fettuccine

DSC_1100I have been promising to share with you some of the yummy recipes I have been making with the new Philadelphia Cooking Creme that I have been raving about on facebook! :)  I stocked up on quite a few of the cooking cremes for $0.50 at Publix and Kroger over the last 2 weeks. 

On top of the Italian Herbs & Cheese Cooking Creme was a a little pamphlet of recipes.  Since I had also gotten a bunch of free pasta at Kroger, the Creamy Bacon Fettucine recipe caught my eye. :)

You can check out Kraft’s version here, but I will share my variations with you.

  • Ronzoni Garden Delight fettucine noodles (my husband and I actually really like these!) - FREE. 
  • 1 cont. Italian Herbs & Cheese cooking creme – $0.50
  • 1 bag of frozen mixed Steamfresh veggies (instead of just peas) – FREE
  • 4 strips of turkey bacon - $0.50?
  • milk, flour, salt, pepper – on hand

I cooked the noodles, while the veggies were steaming in the microwave, and the bacon was cooking.  I warmed the cooking creme and probably added a cup of milk to thin and then a tablespoon of flour to thicken and seasoned with salt/pepper.  When everything was done, I tossed it all together, crumbled the bacon on top, and served it along with some homemade cheesy garlic biscuits!    It was super yummy!! And so easy! 

We got 5+ servings out of this and the whole meal cost under $2.00! 

Have you tried anything with the new Philadelphia Cooking Creme?  I haven’t tried anything that we haven’t loved yet! :)

Wednesday, January 26, 2011

New recipe: Dripping roast beef sandwiches with melted provolone


photo courtesy of CampbellsKitchen.com

I saw this recipe in the Parade magazine last Sunday and thought it looked good (recipe also online at Campbell’s Kitchen).  My husband is not a huge sandwich fan, BUT a hot sandwich with melted cheese is a different story!   :)

I picked up the ingredients at Publix while shopping on Monday.  I used a foot long loaf of wheat french bread (on sale for $1.00!) instead of the hoagie rolls, and just cut it into 4 sandwich size sections.

Here is the recipe (from Campbell’s Kitchen)

1 can Campbell's® Condensed French Onion Soup
1 tablespoon reduced sodium Worcestershire sauce
3/4 pound thinly sliced deli roast beef
4 Pepperidge Farm® Classic Soft Hoagie Rolls with Sesame Seeds
4 slices deli provolone cheese cut in half
1/4 cup drained hot or mild pickled banana pepper rings
  • Heat the oven to 400°F.
  • Heat the soup and Worcestershire in a 2-quart saucepan over medium-high heat to a boil. Add the beef and heat through, stirring occasionally.
  • Divide the beef evenly among the rolls. Top the beef with the cheese slices and place the sandwiches onto a baking sheet.
  • Bake for 3 minutes or until the sandwiches are toasted and the cheese is melted.  Spoon the soup mixture onto the sandwiches.  Top each sandwich with 1 tablespoon pepper rings.
(We did not use the banana pepper rings.)

They were soooo YUMMY and, better yet, MY HUSBAND loved them!  And they only took about 10 minutes to prepare.  These will definitely be on the menu again! :)

Cost:
Wheat french bread - $1.00
Can of soup - $1.25
1/2 lb of deli roast beef - $3.50
Provolone cheese - $2.00
Total: $7.25 (and it made 4 servings/sandwiches) so $1.93 each serving
We each ate 1 sandwich for supper, and another sandwich for lunch the next day.

I bought the soup at full price, so it would have been cheaper if I had stocked up when it was on sale.  Will definitely be watching for it to go on sale.  Plus Publix deli meat is rather expensive, so if roast beef was on sale it would be cheaper.